Thursday, 4 September 2008

Built

Cleaned up with IPA and water


Everything plugged in and working. 


The connections for the mCubed BigNG fan controller were very fiddly and one of my sensors is fluctuating rapidly, so I suspect it is not seated properly


Looks a bit pink in this light, but in real life it's a bit redder


When the fans are turned down to 33% for non-gaming activities it really is quite quiet. From the front, the reservoir is the only giveaway that it is water-cooled


Should have been designed by H R Giger (or Alien fame)  :o)


Showing the top I/O ports: USB, firewire, headphones and mic and even a slot for an external SATA drive


With the Logitech 5.1 speakers set up, not ideally, but with cats and kids what do you expect? 


Monday, 25 August 2008

Initial Testing

A quick update. XP is now installed and drivers for the 9800 GTX and the sound card have been configured. Network is connected, although the ethernet cable I had is now not long enough and the Beast is at an odd angle to accommodate it.

The Logitech 5.1 speakers are connected - pics soon.

I installed AquaMark3D to run a quick benchmark once the graphics card was configured, to get a baseline for the stock system before I start overclocking - this was just over 184,000. Bit of an improvement on the 40K-odd I was getting on my old system!

I couldn't resist it - I had to install Call Of Duty 4 and have a quick play. Pretty impressive, smooth playing with all the graphics set to max and 4X AA. I didn't play around with the anisotropic filtering however. Found one bug or incompatibility or whatever. In single player, when the FNG is doing the cargo ship mockup and then has to exit the building, I got a nv4_disp stop error and BSOD every time.

Was using Forceware 174 drivers as delivered on the CD that came with the BFG card, so I grabbed the 177 drivers from the nVidia site and installed these. Since then (touch silicon) I've had no further crashes.

After some fragging I returned to putting the final touches to the case. I added 2 x 12" cold cathode UV lights positioned along 2 edges of the case and 2 x 12" CC red lights along the opposite edges. The cables for these are not really long enough to be able to hide the bulky black plastic invertor boxes, which is a bit of a shame, but c'est la vie. These were from Akasa and AC Ryan.

I also stuck 2 x 4" CC UV lights to the underside of the reservoir, but to be honest these were a bit feeble in comparison to the 12" jobbies.

The 5mm LEDs that I had bought to stick in the holes in the reservoir and the EK water block for the 9800 made almost zero difference and I decided not to bother with them, as they would just have added more wiring for a very small bling return.

The BigNG fan controller requires some serious planning. Even the base model has 4 analogue sensors and 2 digital ones, and the manual provides little help in deciding on the positioning of these. There are some recommendations from people on the manufacturer's website forum however, and I spent a lot of time here reading about what others had done.

I couldn't actually wire it up because my labelling machine had run out of batteries and tape at the same time and there was no way I was going to not label the sensor wires. But the plan is this:

Channel 1 - controls the 3* top exhaust fans on the triple rad
Channel 2 - controls the rear exhaust fan on the single rad
Channel 3 - controls the HD enclosure intake fan
Channel 4 - controls the small fan attached to the mosfet heatsinks on the mobo

(*) Will require 2 fan splitter cables

Analogue sensors will be attached to

A1 - the CPU (if I can get near this)
A2 - the top of the graphics card, near the GPU
A3 - the top HD drive of the 3 in the HD enclosure
A4 - the mosfet heatsink

Digitial sensors will be attached to

D0 - motherboard heatpipe
D1 - RAM heatsink

Channel 1 will trigger on the temps from A1+A2+D0+D1 (but not sure how yet)
Channel 2 will trigger on the temps from A1+A2+D0+D1 (but not sure how yet)
Channel 3 will trigger on the temp from A3
Channel 4 will trigger on the temp from A4

I will use PWM for the fans, unless this proves too noisy.

Next steps

1) Wire the BigNG up
2) Configure the BigNG drivers and software
3) Install some disk imaging software and do a backup
4) Find the best config file for COD4!

Saturday, 23 August 2008

The Beast lives!!!


Finally I plucked up the courage to plug the power lead in and hit the power switch. Lights and fans but no water circulation - or so I thought.


In fact water was circulating, but there was no sign. The pump was silent, the tubing wasn't throbbing and there were no bubbles to give away the fact that it was working! Maybe I should have included a flow meter after all!


Next step is to finish the lighting and install XP and configure all the hardware. It's running quite noisy at present - guess the BigNG fan controller defaults to max power for the fans.

Sunday, 17 August 2008

Plumbing and Electrics

Flushing out the RAM


All the pipes including the RAM tubing loosely in place for final planning. What to put where, in which order, in which orientation, etc., etc.


The manifold for the RAM doesn't allow room for any clamps. Even these cable ties won't fit more than 2 in the same position. This is going to be the weak point of my loop methinks


Last bit of the plumbing going in - a T-line to make draining the loop a bit easier. Hopefully won't need to do this for many months


T-line incorporated and all the jubilee clips tightened, but not too tight. Don't want to cut the tubing. Reaching all the clips was quite a challenge


Another moment of truth - filling the system. Don't think I would want to do this without a reservoir


Part-way through the filling process. Rocking the PC back and forth to get the bubbles out was a good workout. This is one heavy case. No leaks so far - phew!


Laid out some white towels to check for any leaks and leave it to cook for a bit. None of the electrics are connected, except the pump


No idea what this lead is for. My guess is that it's the power for the I/O port on top of the case. Didn't really want this big wiry mess in the case, but don't have the skill to rewire it


Many hours of cable management later and this is the reverse of the case. The bit you won't see. Lots of room to hide the cables


All plumbing and electrics hooked up and ready to go, but not switched on yet


More tomorrow...

Saturday, 16 August 2008

Testing and Installing the water loop

Flushing the rads out with tap water. Finished up with de-ionised water. No vinegar


Mobo backplate in place and fittings for the EK waterblock being fitted.


Two PVC washers and a metal washer an finally a nut


The backplate with a backplate-shaped rubber washer


Stripping the EK CPU waterblock for cleaning


2 gaskets


The EK GPU waterblock after cleaning with iso-propyl alcohol


The XSPC res with barbs fitted


Testing the water loop overnight. Using an old PSU to power the pump. Components in roughly the same place as they will be in the box


Added an LED just so I know the loop is running. Once the pump was isolated with a gel pad and all the air bubbles removed, it was very hard to tell if it was running or not


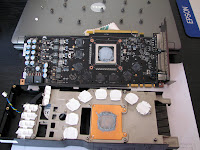
Scary bit - ripping the stock cooler off the BFG 9800 GTX OCX. Came off surprisingly easily. When I removed it no sirens sounded and I didn't receive a visit from the BFG warranty police.
Lots of thermal crap on the heatsink


Several ccs of IPA later...cleaned to a mirror finish


Stock cooler that comes in the E8500 package - really nice. Shame I can't use it


CPU and cooler in place, along with video card and cooler


Installing the exhaust fans on top of the case. Rubber gaskets ensure a snug fit and will help reduce any fan noise


Where the pump will live, tucked away where the HD drive 4-in-3 cage should be. This has been moved up to accommodate the pump. I drilled 2 holes in the base of the case to secure the pump. Note the gel pad to cut down on pump noise. Pump vario control accessible through the front panel


Most of the water-cooling components fitted now. Just the RAM to aquify


All water-cooling components in place, except the RAM. The T-line still needs to be inserted


Cranked the fans up using the old PSU. More tomorrow...
The plan was to assemble the non-w/c components while leak-testing the w/c components by the sink. This would give me something to do while the leak test was running, and also allow me to verify that the graphics card was not a dud, before I rip off the stock cooler and invalidate the warranty. Also I planned to get Windows XP installed and run a benchmark, so that I had something to compare to when the w/c components were added.

I ran tap water through the rads for 10-15 minutes and then flushed them with de-ionised water. Not much crap came out. I didn't want to risk using vinegar, because acetic acid does react with copper. I took the CPU and GPU water blocks apart and cleaned the insides with IPA (Iso-propyl alcohol, not Greene King!) and left them to dry before reassembling. Got to say they were pretty clean though.

I also flushed the reservoir and pump with de-ionised water. When all the w/c components were clean, I cut the Tygon tubing into the measured lengths and connected up the loop. Using jubilee clips, but not wanting to screw them too tight and cut the tubing. Forgot to thread the jubilee clips a couple of times and found that removing the tubing from the barbs is harder than I thought.

Also worth mentioning is to get the orientation of the jubilee clips right for the less accessible connections like the CPU and GPU barbs, otherwise it will be very hard to tighten them in place.

Anyhoo, I got the loop all connected and suspended the reservoir at the highest point, adding de-ionised water until there was no air between the res and the pump inlet. I used an old PSU bridged between the green and black pins to start the pump for a couple of seconds, while the air bubble edged closer to the pump. Then shut off the power and filled the res again, repeating the process until the loop was full-ish.

The variable speed dial on the Laing D5 pump (if that is what it is) seems a bit flimsy to say the least. Unless you push it in while turning it, it just rotates loosely, and even detaches from the pump. I can hear the pump operate at 2, maybe 3 speeds, but 5 is a bit optimistic. I considered RMAing ig, but if it works with good temps I won't bother as it doesn't appear to be a very polished piece of kit.

Went off and made a cup of coffee and came back later, shook a few components to get the air bubbles out and switched the power off and on a few times. Placed individual kitchen towels under the components in the loop to identify any leaks and left it to run.

Returning to the plan of assembling the non-w/c components, I added the BFG 9800GTX OCX, after reseating the motherboard and adding the backplate and screws for the EK CPU block. But when I came to install the E8500 processor using the stock fan, I realised that this was not a goer - the stock cooler and fan would need to fit into the holes now occupied by the screws for the EK CPU block. Major Doh!

Instead I fixed up the mountings for the BigNG to fit into a 3.5" bay and mounted this. The BigNG comes supplied with an internal USB cable. The P5Q Deluxe mobo has 2 internal USB headers, both of which could be used by the Coolermaster case to provide external USB ports in the top of the case, near the power switch. The BigNG could also ne connected via a normal USB cable to an external USB port, but it seems a bit clumsy to do this. So I will have to use one of the P5Q's USB headers to connect the BigNG, and use the other to connect 2 of the 4 external USB ports in the top of the case. Nothing is perfect.

I figured out where all of the case connections fit onto the motherboard and either connected then where appropriate or rerouted the cables through the Coolermaster's excellent cable management system.

Fitted the OCZ RAM - sans watercooling. They are absolutely HUGE and wobble in the DIMM slots.

The screws supplied with the rads - 1.25" - do not quite extend far enough into the case to fit the rads on securely. They just about do the job, but with a triple rad on top and the fact that some of the screw holes do not actually line up with the rad holes, I want to be SURE that it ain't gonna fall off while I'm playing COD4! I think 1.375" will be just about perfect. Off to B&Q tomorrow to try to find some.

Thursday, 14 August 2008

The missing piece of the puzzle arrives


The very hard-to-find memory sticks finally arrived today


Gatefold sleeve


Gorgeous, with or without water-cooling!


40" tubing (needs to be cut to 8 x 5" lengths)
2 adaptors
choice of 1/2" and 3/8" barbs


Now I can finally get started on the build.